みなさんこんにちは!おさかなです!
今回は「Google DriveでWebサイトを公開する方法」について、書いていこうと思います!
それでは、レッツゴー!!!!!
・無料でWebサイトを公開したい人
・かんたんにURLを取得したい人
・Google Driveを活用したい人
はじめに
今回は「Google Drive」をサーバーの代わりとして使うことで、Webサイトを公開する方法をご紹介していきます!
最大15Gまで無料で、FTPソフトも不要という優れものなので、手っ取り早くポートフォリオサイトを公開したい方などにオススメです。
※今回の方法は「静的サイト」のみ公開可能です。(HTML,CSS,JSなど)
よってPHPなどの動的言語は動作しないのでご注意ください。
「Google Drive」ってこんな使い方もできるのか!

「Google Drive」にフォルダをアップしよう!
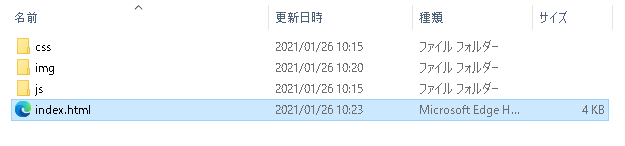
それでは早速やっていきましょう!まずは、アップロードしたいファイルをフォルダにまとめておきます!
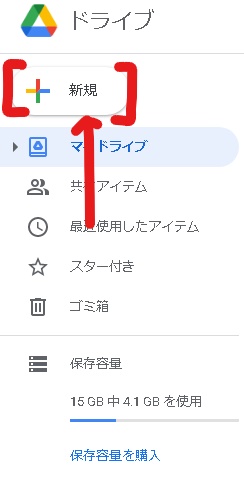
次に「Google Drive」を起動します。
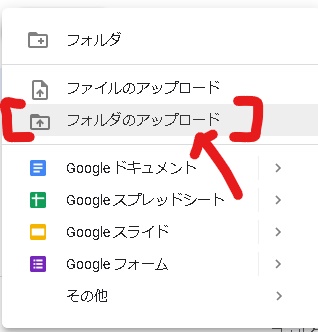
「+新規」>「フォルダのアップロード」をクリックして、公開したいフォルダをアップロードしていきます!(ポチっと!)
確認ウィンドウが開くので「アップロード」をクリック!

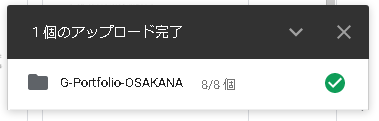
右下にこんな表示が出てきたら、無事にアップロード完了です!(やった~!)
あともうひと踏ん張り…!がんばりましょう!

フォルダを公開していこう!
それではアップロードしたフォルダを、Webサイトとして公開していきましょう。
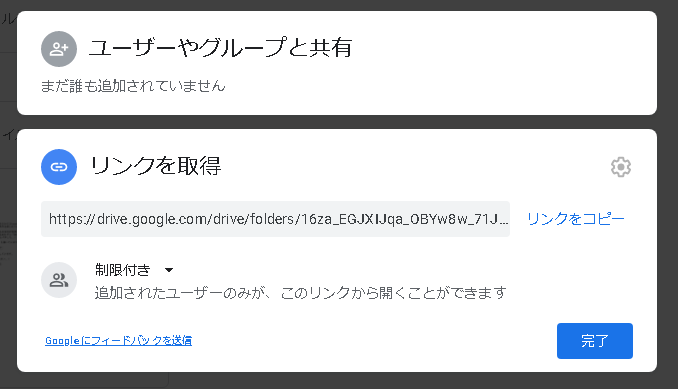
まずは、フォルダ名を右クリックして「リンクを取得」をクリックします。

すると…こんな感じのウィンドウが表示されると思います!(なんじゃこりゃ!)
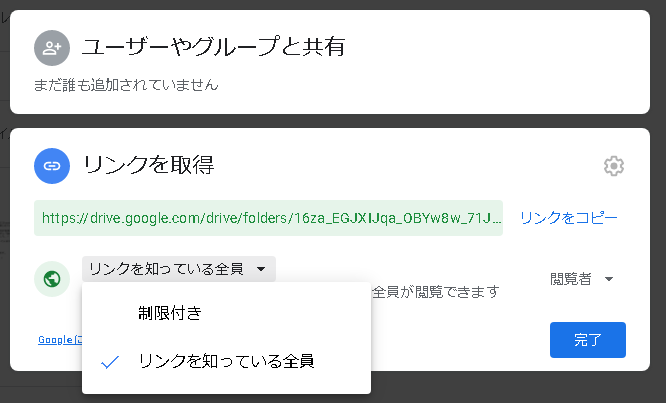
ここで、公開範囲を「リンクを知っている全員」に設定しておきます!(完了ボタンも忘れずにね!)
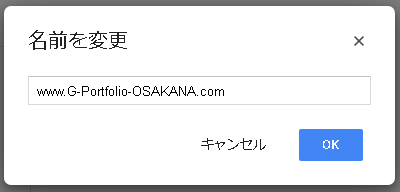
次に、フォルダ名を右クリックで「名前を変更」をクリックします。
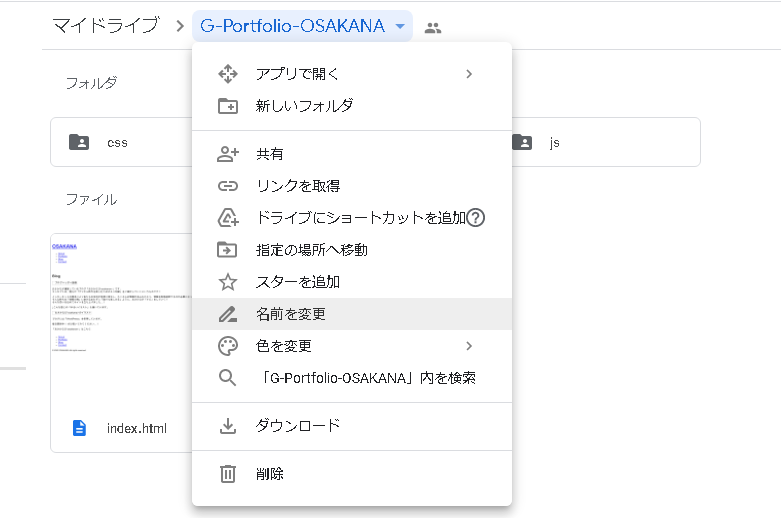
フォルダ名をURLっぽくするために冒頭に「www.」末尾に「.com」を付けましょう!
あともう少しです!(ファイト🍫)
サイトのURLを取得していこう!
それでは、最後に「サイトのURL」を取得していきましょう!(よしっ!)
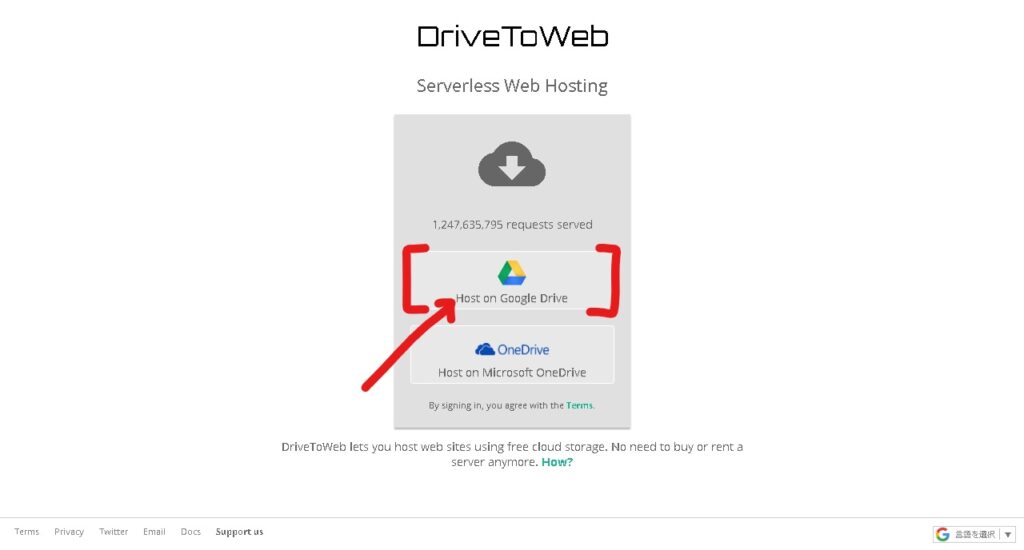
まず下記サイトにアクセスします。

するとこのような画面が表示されるので「Host on Google Drive」という上のボタンをクリックします。
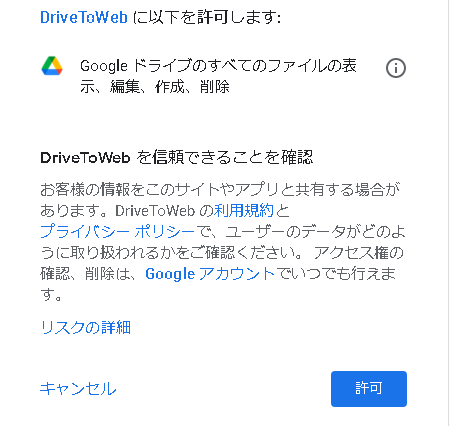
Googleアカウントにログインして「許可」ボタンを押します。
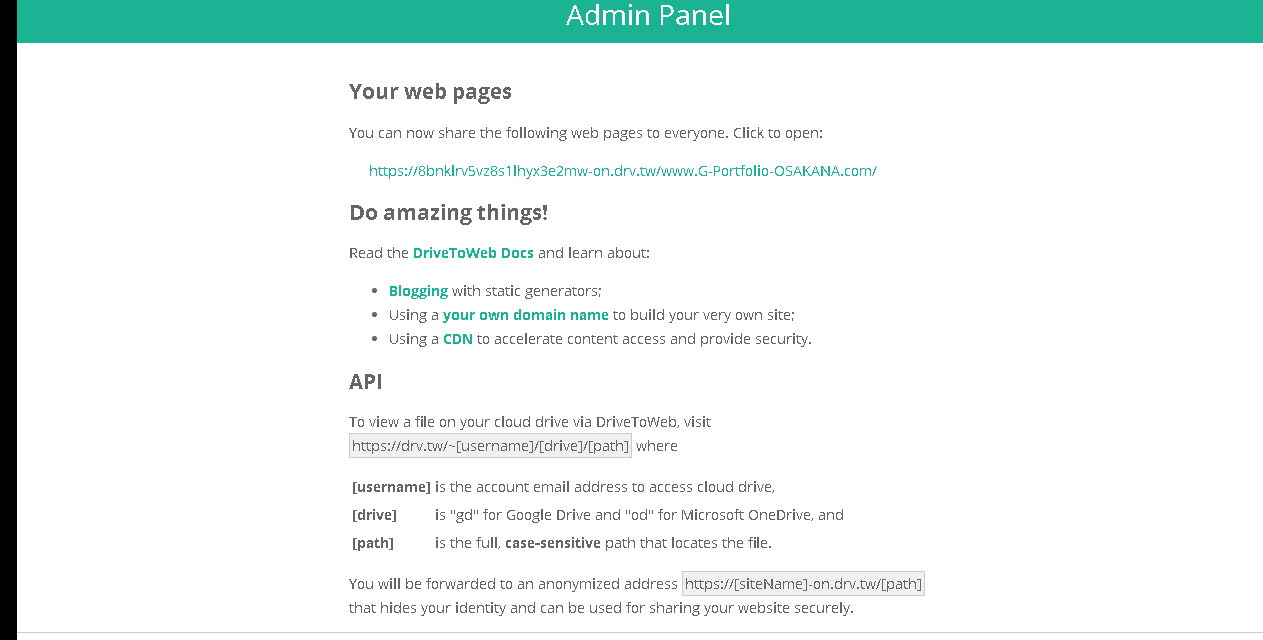
するとこんな感じの英語のページが表示されました!
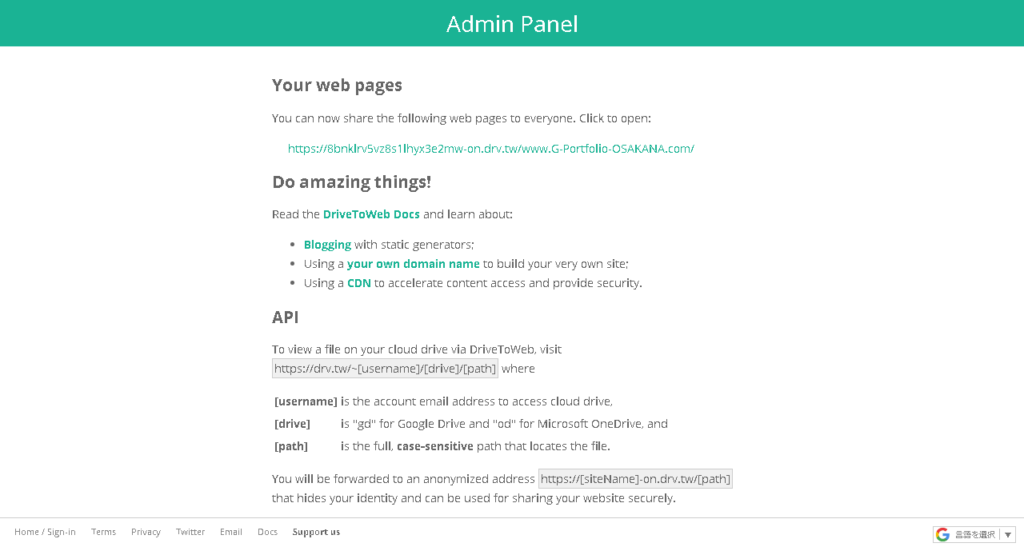
「Yout web pages」の直下にあるリンクが、Webサイトの「URL」になります!(おおお!)
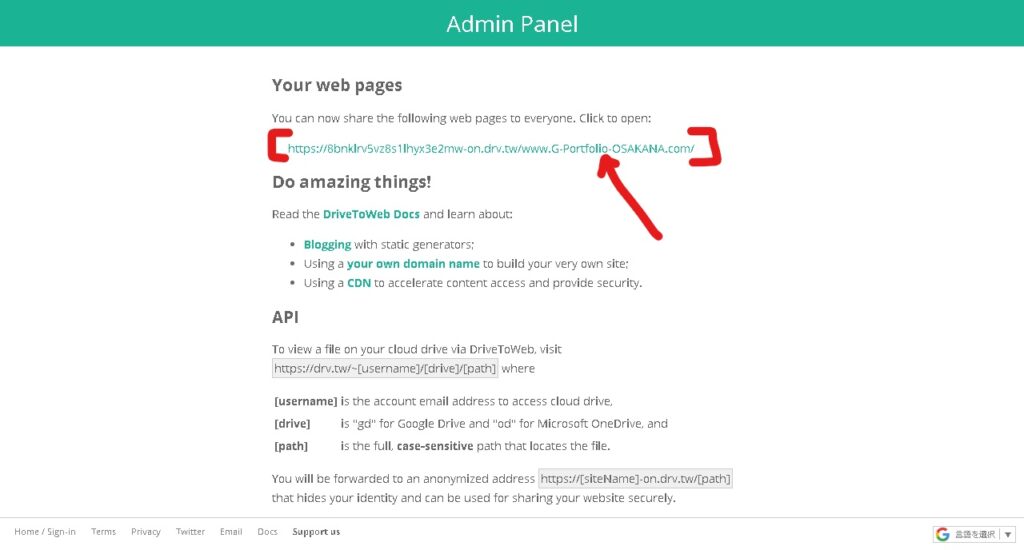
実際にURLを開いてみると…?
こんな感じで、無事にWebサイトを公開することができました(やった~!)
これで全ての作業は完了です!本当におつかれさまでした!☕
↓実際に完成したサイトがこちら!


ここまで読んでくださり、ありがとうございました!